Focusing
The Focus screen gives you direct control over your motorized focuser with real-time star analysis, plus a bracketed autofocus routine that refuses to guess: it only trusts a focus position it has actually measured on both sides.
Manual Focus
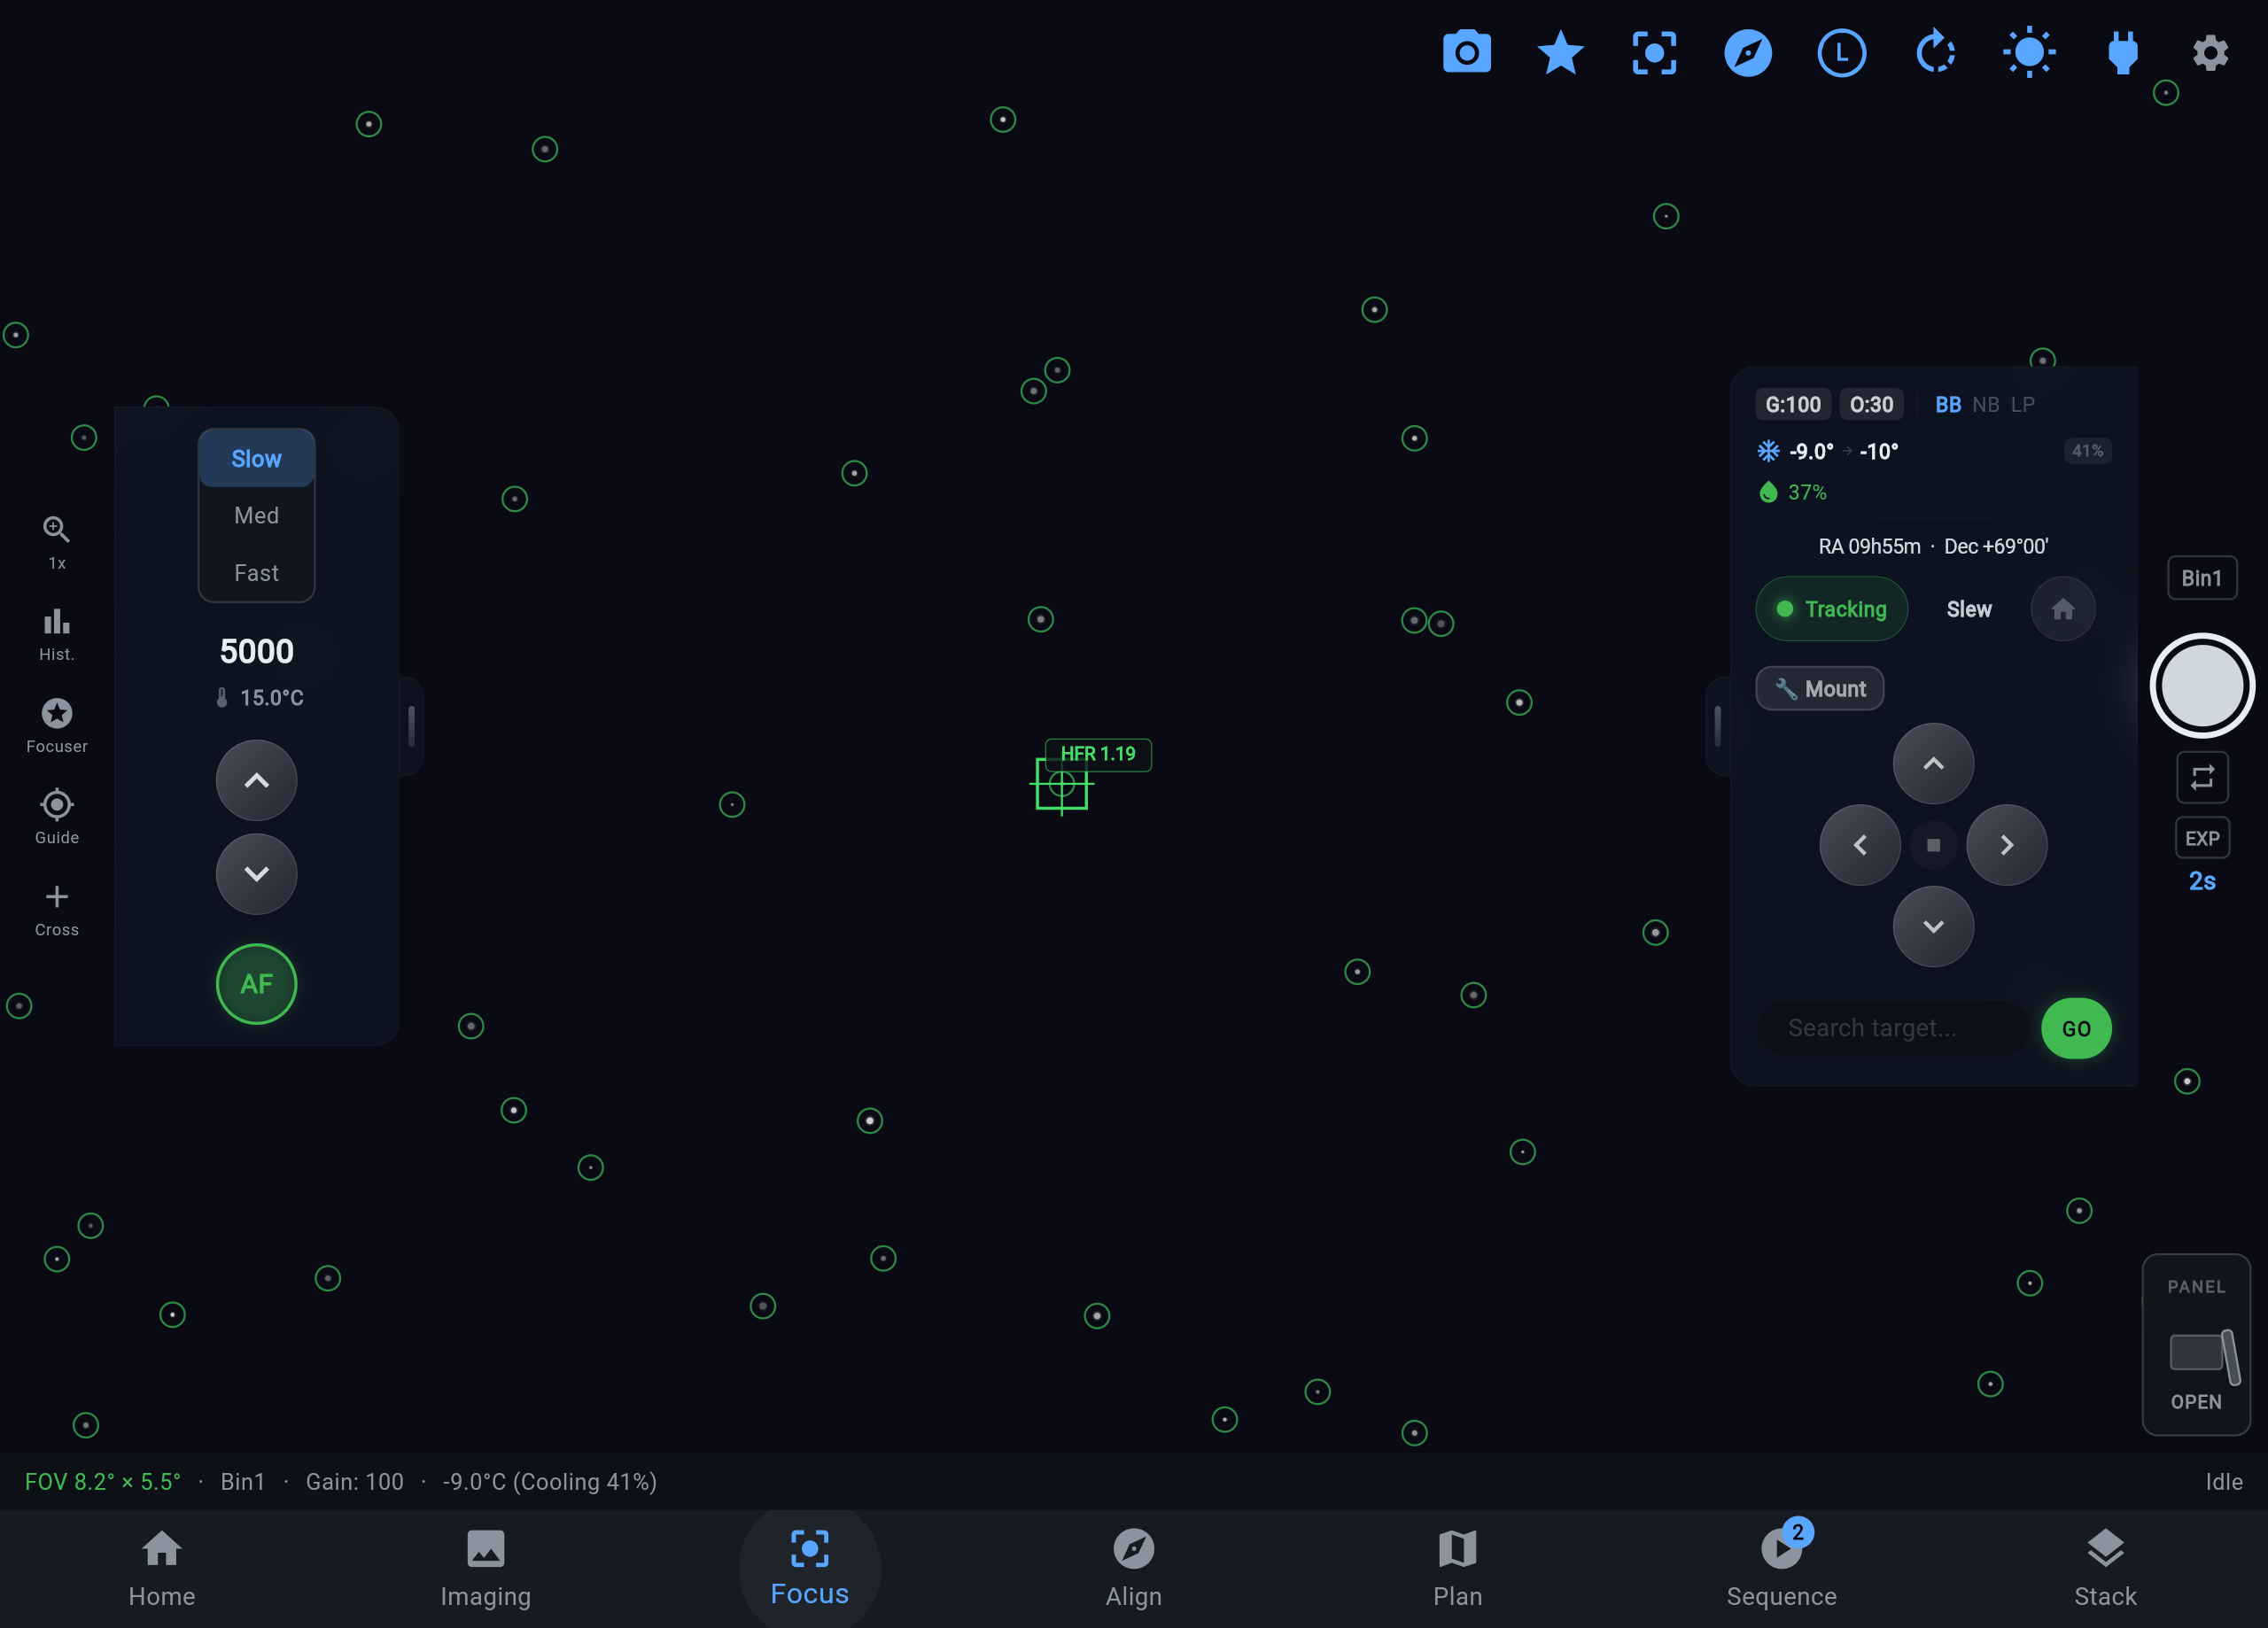
Section titled “Manual Focus”Open the Focus screen from the bottom navigation bar or from the Imaging screen toolbar. The screen shows a live camera view with focuser controls overlaid.
Focuser Controls
Section titled “Focuser Controls”- Step buttons — Move the focuser in or out by the selected step size. The current position displays as a step count at the top of the screen.
- Speed selector — Choose between coarse, medium, and fine step sizes. Use coarse steps to get close, then switch to fine steps for precision adjustment.
- Position readout — Shows the current absolute focuser position in steps. Tap it to enter a specific position and move the focuser there directly.
Star Analysis
Section titled “Star Analysis”While focusing, ARIS continuously analyzes the image to provide real-time feedback:
- HFR (Half-Flux Radius) — Displayed prominently on screen. This is the primary metric for focus quality. Smaller HFR means tighter stars. Adjust the focuser until HFR reaches its minimum value.
- Peak value — The maximum pixel brightness of the selected star. A higher peak with a lower HFR indicates better focus. If the peak is saturated (maxed out), reduce the exposure time.
- Star profile — A 3D surface plot or cross-section of the selected star, showing the intensity distribution. A well-focused star shows a tight, symmetrical peak.
Tap any star in the view to select it for analysis. ARIS highlights the selected star and centers the star detail overlay on it.
Loop Mode
Section titled “Loop Mode”Toggle loop capture to take continuous short exposures while you adjust focus. Each frame refreshes the HFR and peak readings, giving you immediate feedback as you step the focuser. A 2-3 second exposure is a good starting point for focus loop.
Autofocus (Bracketed V-Curve)
Section titled “Autofocus (Bracketed V-Curve)”Tap the AF button to run autofocus. ARIS sweeps the focuser through a window of positions, measuring HFR at each step to build a V-curve — but unlike a simple sweep-and-fit, the routine will not accept a minimum until it has bracketed it:
- The lowest point must have at least 4 rising fine-pitch measurements on each side before any fit is trusted. If one flank hasn’t risen, the sweep extends step by step until it has.
- The curve is fit only within the bracketed window, and the fitted best position must land inside it. ARIS never extrapolates a focus position it didn’t actually measure across — the classic failure mode where a one-sided sweep “finds” focus thousands of steps outside the data.
- Coarse-seek rescue. If focus starts badly off, the routine recognizes the one-sided curve, strides outward with doubling steps until HFR turns upward, then fills in a fresh fine window around the best point and brackets normally. You can start far from focus and still converge.
- Verification frame. After moving to the fitted position, ARIS takes one more exposure and checks the measured HFR against what the run predicts is achievable. A verification frame that doesn’t measure up fails the run.
- Every failure returns the focuser to its starting position. A failed run leaves you exactly where you began — never stranded at a random position.
The Focus screen shows the routine’s work as it happens: the live V-curve chart, a star-crop inspector with an HFR ring drawn around the actual star being measured (refreshed with every measurement), the fit R², and the current step size. Failed runs say so honestly, with the reason.
The Autofocus Progress Card
Section titled “The Autofocus Progress Card”You don’t have to be on the Focus screen to see any of it. Whenever the system triggers an autofocus — a sequence trigger, Guardian, a filter change, temperature drift, the elapsed-time timer — a floating progress card appears on every screen, with the live V-curve, the star crop, and the result. Drag it anywhere, resize it from the corner, and it remembers where you put it. A successful run lingers a few seconds and puts itself away; a failure stays until you dismiss it, so a 3am failed focus is still on screen at 7am. Runs you start by hand don’t show the card — you’re already watching.
Autofocus Settings
Section titled “Autofocus Settings”Configure the routine from the focuser settings (gear icon):
- Exposure Time (s) — Exposure per measurement frame. 2-4 seconds suits most setups; longer exposures give steadier HFR readings.
- Step Count — The number of positions in the initial sweep window.
- Base Step Size — Focuser steps between measurement positions. Together with step count this sets the sweep range; size it to comfortably span your critical focus zone. The bracketing and rescue logic will extend beyond the initial window when it needs to.
Per-Filter Focus Offsets
Section titled “Per-Filter Focus Offsets”If your filters are not parfocal, store a focus offset per filter slot. When a sequence or manual change switches filters, ARIS applies the offset automatically — no refocus needed. You can also designate a dedicated AF filter (for example, Luminance): autofocus swaps to it for the sweep, then returns to the shooting filter and applies its offset.
You don’t have to measure every offset deliberately. ARIS mines the autofocus journal for pairs of successful runs through different filters taken close enough together that focus hadn’t drifted between them — each pair is exactly the measurement a dedicated offset run would have made — and offers them as offset candidates for you to review and apply. Nights you’ve already run become offsets you don’t have to measure.
Autofocus During Sequences
Section titled “Autofocus During Sequences”Sequences can trigger autofocus automatically:
- at sequence start — and the start run looks ahead to the first target’s first filter: the sweep runs through the glass the night actually opens with, not whatever filter happened to be parked in the wheel, so the sequence doesn’t pay a second full sweep moments later when the first filter change would otherwise re-trigger it,
- after a meridian flip,
- on filter change, when the new filter has no stored offset,
- when the focuser temperature drifts 2 °C from the last run,
- every 60 minutes of elapsed imaging.
Each trigger is individually configurable, and guiding is paused and resumed around the sweep. See Sequencing for how these fit into a full night.
Temperature Compensation
Section titled “Temperature Compensation”Temperature changes shift the optical path length, pulling the system out of focus over a session. ARIS can compensate automatically using the focuser’s built-in temperature sensor. In focuser settings:
- Steps per °C — How many focuser steps to move per degree Celsius of change, including direction (negative moves inward as temperature drops — typical for refractors). Run autofocus at two different temperatures and divide the position difference by the temperature difference to find your coefficient.
- Hysteresis (°C) — The minimum temperature change before a compensation move triggers. Too low causes constant tiny adjustments; too high lets focus drift. 0.5-1.0 °C is a reasonable starting point.
- Averaging Samples — How many sensor readings are averaged per decision, smoothing out sensor noise so compensation follows real temperature trends.
Backlash Compensation
Section titled “Backlash Compensation”Mechanical backlash causes the focuser to lag when reversing direction. In focuser settings:
- Value (steps) — The number of extra steps to overshoot when reversing direction. The focuser moves past the target by this amount, then approaches it from the consistent direction.
- In / Out — Which direction of travel the compensation applies to. Typically set opposite your most common focusing motion.
To measure your backlash: move the focuser outward to a reference point, note the position, then reverse direction and move back. The difference between expected and actual position is your backlash in steps. Autofocus itself always makes its final approach from the sweep direction, so a well-set backlash value keeps manual moves and AF results consistent.
When the Focuser Stops at 0
Section titled “When the Focuser Stops at 0”A focuser counts motor steps, and 0 is only where that count last started. So the focuser can stop at 0 while the drawtube can still move further. At 0 the Focuser screen says so, and the minus step buttons dim.
- Set to … — Gives the spot the focuser is at a higher number, the middle of the numbers your focuser takes. Then keep stepping in. Nothing moves.
- Set position — Gives the current spot any number you type, for example to restore a count the focuser lost. Nothing moves.
- Focus screen — Tap the dimmed arrow at the limit to get the same Set to … offer.
The same applies at the top of the focuser’s count. ARIS can do this when the focuser’s driver takes a new position number (most INDI focusers, such as the ZWO EAF and the Pegasus FocusCube3). A focuser that ARIS reaches through ASCOM, Alpaca or NINA cannot, so use the focuser maker’s app for those.
Best Practices
Section titled “Best Practices”- Focus at the start of every session after the telescope has thermally equilibrated (typically 20-30 minutes after setup) — or just let the sequence-start autofocus trigger handle it.
- Use a Bahtinov mask for visual confirmation if you have one. ARIS can analyze the Bahtinov diffraction pattern to confirm focus.
- Store per-filter offsets so filter changes never cost you a refocus, and pick an AF filter if your narrowband filters make star measurement slow.
- Enable temperature compensation for sessions longer than an hour, and let the 2 °C autofocus trigger back it up.
- Watch the HFR trend in your capture quality badges on the Imaging screen. A gradual rise means thermal drift that compensation and in-sequence AF should be catching.